Sunday, March 30, 2014

Making Room for Strawberries

We've been making a lot of changes in the yard and one that is ready for documentation is the removal of bamboo from this garden bed and making it a more useful space for us. I assume that whoever planted the bamboo in the middle of this garden bed was doing so for kind of a privacy screen, because there is a small window on the second floor of the house next door.

Bamboo garden box when we moved in
We decided we'd rather use this garden bed for strawberries, but didn't get rid of the bamboo entirely: I transplanted 6 large pots full, located in between the bed and the fence. I really like bamboo, but I needed it to look as if it were placed more purposefully, and this arrangement still allows for a bit of taller natural privacy at this location along the fence.

I used about half of the existing bamboo, which was all I was able to easily dig up. The larger, more dense clump in the center had deeper roots and was too difficult to separate out. So I listed the remaining bamboo on the Portland Craigslist free section, and a guy was at our house within a few hours to dig out the rest of it and take it with him, leaving a really nice and empty garden box:


Since we planned to use this garden bed for strawberries, it made sense to remove the upper bed section and use just the lower. The upper section had started rotting at the edges, so the short ends pulled off easily on each side. As you can see, the top bed wasn't completely full, but before anything else I had to remove a lot of dirt and level the remaining soil to just below the lower bed line. Then I took a hammer and removed the small pieces of wood holding the longer side on, and removed that. I left the fence side plank on for now, but may remove it later. It's not really in the way there and that cuts down on wood waste if we can't find another use for these. In the photo below you can see the old boards leaning up against the shed on the left, which we are planning on getting rid of by also listing it on Portland's Craigslist free section.

We used some of the extra dirt to fill the raspberry bed and topped off two of the planned vegetable garden beds (the only 2 currently weeded and now ready for planting). I shoveled the remaining soil onto a tarp and into some pots, which we'll need once the rest of the garden beds are cleared of yard debris and weeded.

Strawberries planted
Amongst other things, I finished the extra dirt removal, took off the upper bed planks, and planted the strawberries on a single, 65+ degree Sunday in late March. The strawberries I'd purchased at Portland Nursery the Friday before on my way home from work. There are about three rows each of the three varieties I selected: Albion, Benton, and Quinault. I spent some time at the nursery reading all of the tags and decided on those three for best length of fruiting through the spring, summer and fall. We probably won't have much fruit on them this year  since they are just establishing and we're supposed to pinch off the flowers to help the plant grow larger and spread. Next year though, we'll have a very nice crop!

Update: September 2014. Pretty much all of the transplanted bamboo died, so I cut it all down! Still have to throw the roots in the compost bin and find a new place for the remaining soil. That will be a project for spring!

Friday, March 28, 2014

New Water Heater & (Surprise) Furnace

It was only a matter of time before we needed to hire an outside company to come in on one of our planned projects. This is the first! The pipes in the house were galvanized steel and needed to be updated. There was of course absolutely no way we were going to try replacing the water pipes within our walls and crawl space by ourselves.

We received a referral for re-piping specialists by the company providing an estimate for a new water heater. Originally we were thinking about getting a tankless water heater instead of the traditional tank, but eventually decided against it. We have never run out of hot water with a regular tank, so needing endless hot water wasn't really an issue. We are going with one fueled by gas instead of electricity, which will be more efficient, and it's placement is right next to the furnace, so it's no longer taking up valuable space. Another benefit to a regular tank is extra water storage in the event of an emergency.

Here is the the original electric water heater and it's location in relation to the furnace (And ugly screen door that no longer exists:


Goodbye old water heater
And hello new water heater:


It fit perfectly between the furnace and the brick exterior of the fireplace, where there was even an existing exhaust port through which to run the additional duct work.

We thought all went well as they finished and cleaned up that Friday afternoon...until later that evening when temperatures dropped and the furnace kicked on for the first time. I heard what sounded like a door slamming in the garage. After turning on the light, then a fuse blowing, leaving me in darkness, I saw an orange glow and flames coming from the lower section of the furnace. It was on fire.

The small amount of gas that ignited burned out quickly, with Nick blowing out the remaining flame. He pulled into the driveway right when this was happening, and I had opened the garage door to air out the smoke smell that immediately filled the air.

Thinking this was probably related to the plumbing company tapping into the gas line shared by the furnace, we called them and the owner came to check it out and take some pictures on Saturday morning. Then his furnace guy came by a few days later and concluded that yes, it probably was something they did on installation of the water heater - likely not reattaching something properly. So the next day he was back with a brand new furnace for us. The original furnace was older and would have cost as much to repair as install a new one. Luckily this was all covered by the plumbing company. So instead of just a new water heater, we ended up with a new furnace as well. With all of the other necessary purchases on the house this year, we figured we'd use the old one for the winter and replace it in the fall. Now we don't have to! With this upgrade, every single appliance in our house - from furnace and water heater to toaster oven - is brand new in the past 6 months.

And I can't believe I forgot to take a picture of the old furnace post-fire, but it really wasn't that bad, Just a little charring on the metal and burned plastic coating on some wires. But here's the new pair:


And now the corner where the water heater used to be is much more open. Eventually we'll be finishing the garage and this will be a nice area of built in (upper and lower) cabinets with space for the mini-fridge, new sink and counter tops.


Friday, March 7, 2014

Cabinet 'Demolition' & Dishwasher Installation

We've been so busy with other things that progress on the kitchen has been on hold. Everything that is left to do is dependent on other things being done, and we're finally on our way to completing them now that the water pipes have been replaced. In addition to replacing the pipes, the workers also installed our new dishwasher. So in preparation for that, we had to do a little "demolition" to make room, since it wasn't just that the house didn't come with a dishwasher, it has never HAD a dishwasher.

Like we did with the refrigerator, we chose a smaller one to better fit the kitchen. That way our needs are met with minimal disruption to the flow and it doesn't feel like we tried cramming too much into the space. After not having a dishwasher for years (4+ for me, 12+ for Nick), just having one at all will feel like a luxury! We'll probably just run a load or two per week and continue hand washing pots and pans, since we use those almost daily.

After much research and reading consumer reviews, we decided on this Frigidaire 18" dishwasher in black. We decided against a stainless steel exterior in order to allow the dishwasher to blend in more with the lower cabinets rather than stand out.

 
We actually ordered this back in January and it's been in the garage since then. Once we set a date for the water pipe replacement and dishwasher installation, it was time to do "demolition," with demolition in quotation marks because there was really very little that needed to be done. Nick took on this project:

Removing the cabinet end, which was just this half-wall thing 

After end piece removal
We couldn't extend the existing base to create the wider dishwasher platform because it was too tall. We needed something at a height about half that. So we removed it to get down to the flooring:


The newly opened area under the counter top. You can see where we moved the range plug, which would have been in the way directly behind the dishwasher.


And a shot of the dishwasher temporarily in place:


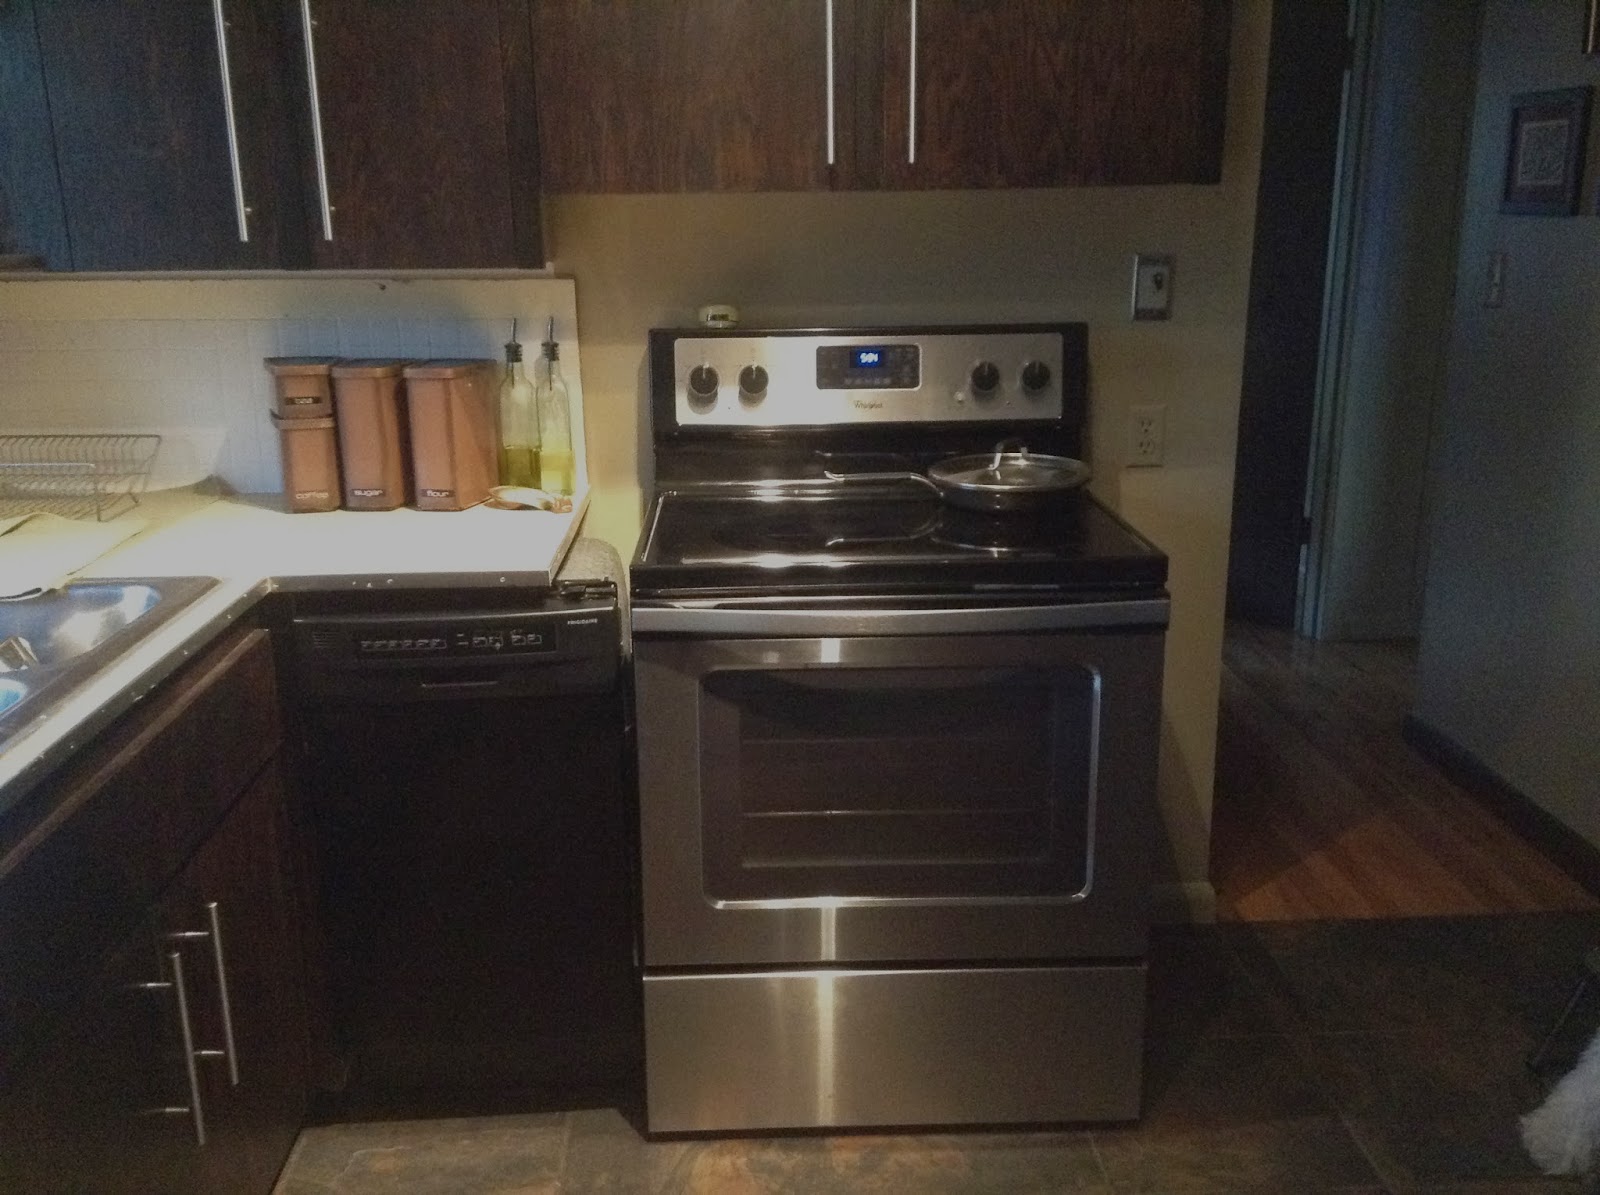
We still need to build a little platform for it to sit on, to bring the top of the dishwasher up to where it needs to be in order to attach to the underside of the future new counter top. Here's an 'after' shot of dishwasher and range together, pre-platform for dishwasher:


The new counter top will extend across that gap shown above and nearly be a nearly seamless transition to the range. We are well on our way to finishing the kitchen now. We waited on the dishwasher installation until we had the new pipes. We could not get accurate measurements for a new counter top until the dishwasher was in, so now we can get that measured and ordered. Then we can start removing the old back splash, and once the new counter top is installed (another job we're not doing ourselves), we can put in the new back splash.