Showing posts with label yard. Show all posts

Saturday, July 19, 2014

Chicken Coop - Final Improvements

Way back in January I first posted about the improvements we began on the chicken coop that came with the house. That weekend we cleared the run of blackberry brambles, made some small improvements to the access panel to the coop, and painted a single coat.

Now, nearly 6 months later, we've completed the rest of the improvements we planned to make and finally have chickens. Here are the rest of the coop updates we made before bringing them home:


Nick cut a new door out of plywood, which was much more sturdy that the original. This new door also includes new hinges, a bolt that secures it shut at night, and a metal hook and screw eye to hold the door open during the daytime. When I went over the entire coop with a second coat of new paint, I also painted the new door:

New chicken feeder and fount
Nick did the same for the access door to the nesting box at the back of the coop. It didn't need to be a thicker wood so we re-used the existing door, but we did add hinges. Before it was just screwed in and you pushed it aside to gain access, with no way to lock it. Like the coop door above, there's a new bolt mechanism to keep this side more secure as well.


I painted this as well. You can see how well it blends in below. 


Now at quick look at the inside:


The inside was pretty dirty, with chicken droppings and old shavings on the floor and nesting box. I swept out all of the shavings and removed the existing cloth ceiling from the top of the nesting box, replacing it with plywood. After the floor was clear, I pulled out the linoleum lining the coop and hosed it down outside. Once dry and placed back in the coop, I put a layer of fresh shavings down.

While I worked on cleaning and painting, Nick focused on outer security. There were some areas that weren't as secure as we'd like, including the door to the run. The door was surprisingly wobbly at the top and bottom and had only one bolt closure in the middle. To strengthen the door, Nick reenforced it by screwing lengths of wood around the entire perimeter. No more wobbly door. He also added a second bolt closure and changed the location of the original, so now there's one down lower and one near the top.


One all the door reinforcements were added, I painted it and the frame of the roof. We also added a door handle. In addition to the door, we did some spot securing of the wire around the run. This was an incredibly well made run and coop. The wire edging was dug down into the ground at least 6-8 inches. The chickens have dug down about that far in a couple areas and the wire continues even deeper.


I also cleaned the run and coop roofs by hosing them down, removing all the leaves and gunk build up with a power wash. That was around the time I added the new and extended gutter and added rain barrel.

Ready for chickens
And the before shot:


Tuesday, July 8, 2014

Backyard Before and After: Part 1

The yard is still a work in progress and there will probably end up being like 30 before and after entries, but this is the first one complete right now: the southwest corner where you enter the backyard when following the sidewalk around the garage. 

This is what the area looked like when we walked into the backyard on a visit at the end of May 2013:

May 2013
I used some of these photos on a 'before and after' post last year to show how fast things grow in Portland in the spring, since it was only a month between the shots above and below.

Besides filling with weeds, this area became overgrown with the blackberry plants that were there, and all the offshoots that grew from them over the time the house was vacant. There were also about a dozen small cherry trees growing here. We assumed they popped up from birds dropping seeds from cherries picked off a neighbor's tree next door. While we'd like a cherry tree, that neighbor's tree is full-sized. A dwarf cherry variety would be a must for our yard space, so these trees had to go.

April 2013
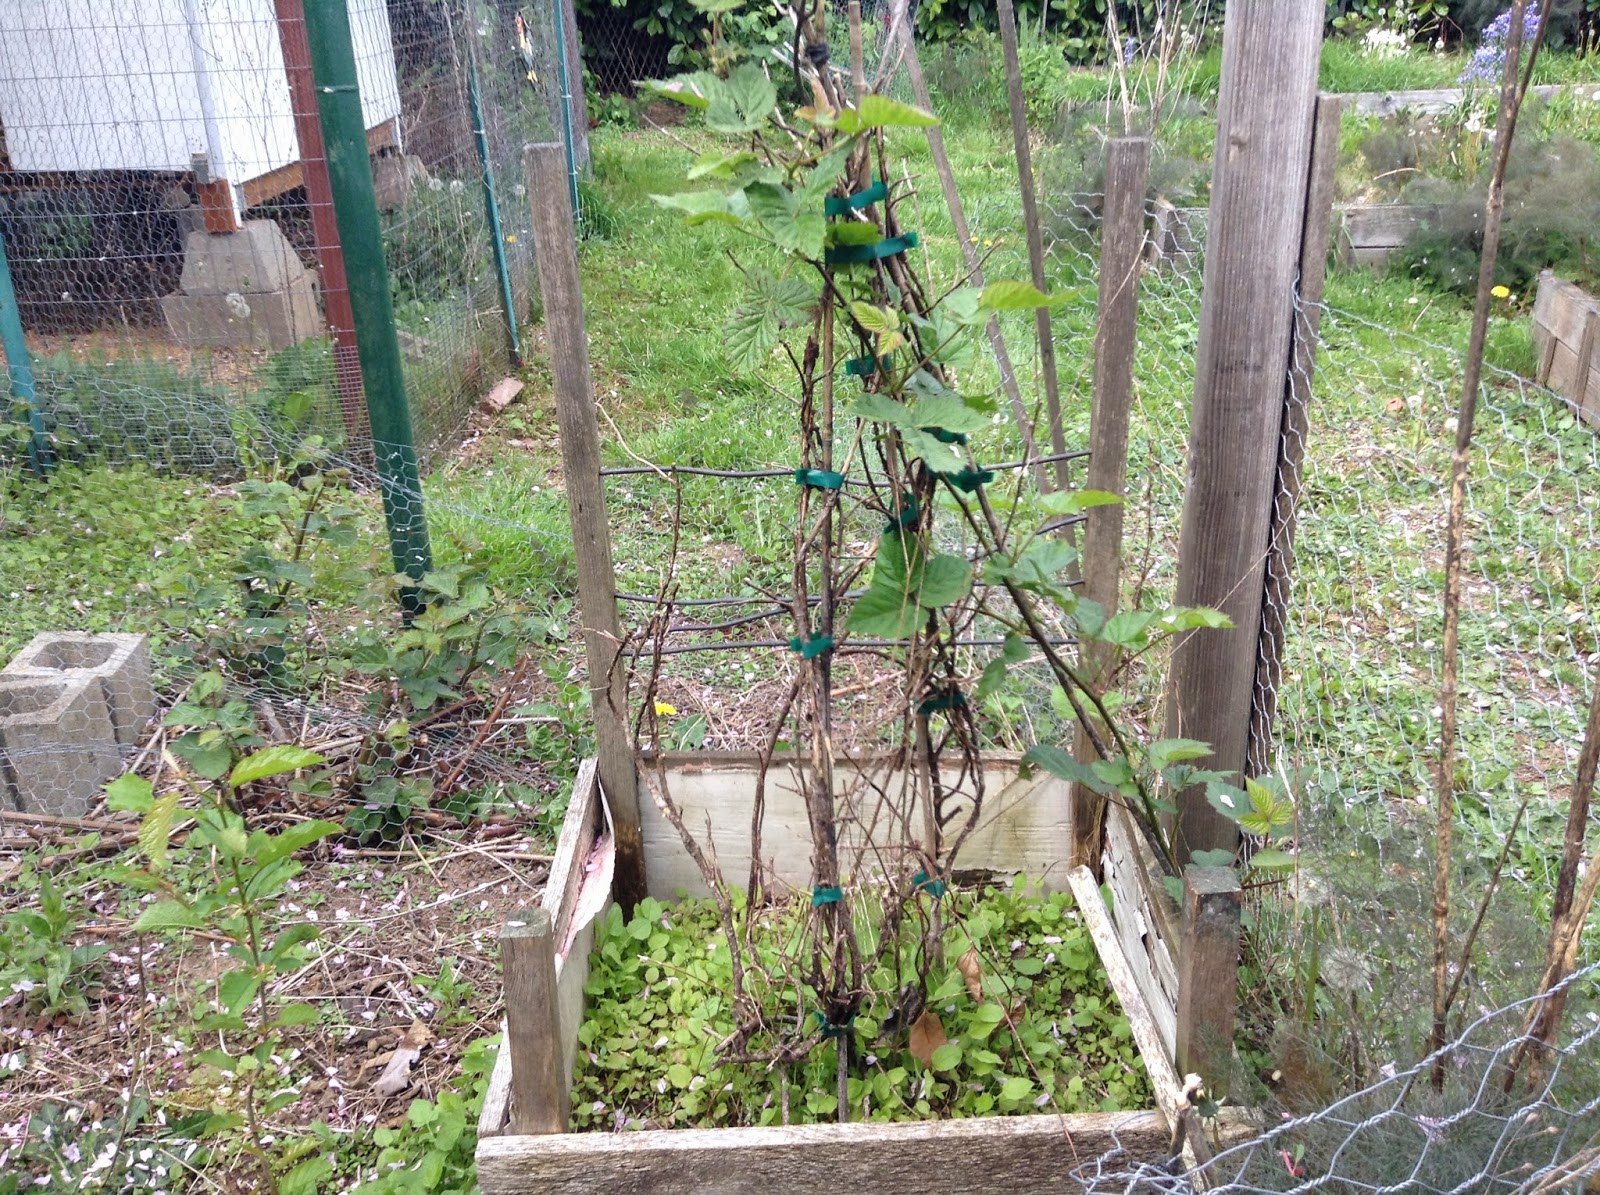
During some of our summer visits and soon after we moved, we started clearing this area. I took down the chicken wire fencing between the wood fence and around the clothesline. I cut down the cherry trees to dry for firewood and pulled out the roots. We never figured out what the plant shown below was since we never saw it flower or fruit, so we pulled it out and removed the wooden box and trellis.

April 2013
Over the winter I cleared out remaining fence scraps, concrete blocks and other debris, pulled weeds, and tilled the area along the fence, as seen below.

January 2014 
While the blackberries were still dormant, I transplanted them. Added trellises, pulled weeds, tilled the entire area and spread grass seed once it started getting warmer. And here is what it looks like now:

June 2014
Yeah. HUGE difference.

In the earlier photos you could barely see that there were pear trees in there. Nick did a lot of pruning since they'd been neglected for so long, so they are all nicely-shaped now and all growing an incredible amount of fruit.

We definitely wanted to keep the blackberries, just a little more controlled and deliberately placed. Fortunately the main plant was already in a great location next to the clothesline, so we kept it there, just adding a trellis so we could train the branches to grow up instead of out. It looks much cleaner, takes up less space, and the berries will be more easily accessible for picking from any side.


I wanted to keep a few of the smaller blackberry offshoots as well to increase the fruit yield, so I made a plan to transplant them while still dormant to a new location along the fence, selecting the largest of the offshoot systems and composting the rest. I attached the trellises along the fence area between the two pear trees and transplanted those root systems. These trellises and the trellis attached to the clothesline we found in other areas of the yard, so those were existing. We always try to reuse or re-purpose existing items for projects before buying anything new.

As you can see below the newer plants are still fairly small, but should get bigger and bigger every year, each eventually getting as big as the mother system above. Like our other fruits and berries, I'd like to have enough blackberries to eat some from the bush, use some fresh picked for baking, some to freeze, and some to can as a compote, probably making a plum/blackberry mix to make them go further. We're really looking forward to being able to add stuff we grew ourselves to our meals year-round!


And here's another view of the same area, before and after:

May 2013
June 2014

Wednesday, June 18, 2014

Additions to the Family


I'm no longer the only female around! With Nick, two male cats, and a baby boy on the way, I was significantly outnumbered. Now we are even with the recent addition of 3 hens to our newly-improved coop and run! They are still too young to lay eggs, but we're happy to have gotten them at this stage so we can enjoy watching them settle into their new home and grow a bit before they begin laying. 

Chicken ladies
While my sister and niece were visiting, we arranged a trip to the 'country' with some friends who also needed to get some new chickens to add to their existing two. After some searching on Craigslist, we found people raising free range laying hens and had a large number available, since between us we needed five of them.

It was a really rainy day, so chasing hens around a muddy yard was pretty challenging and funny. It poured rain so hard right after we got there that the family invited us into the large garage nearby to wait it out. That's where they had their heat lamp and area for the young hens (pullets) that weren't yet ready to go outside. These pullets were easier to catch, and my niece was excited to get to play with and hold some of them while we waited:


After the rain let up a bit, we went back out and tried again. They had five different chicken varieties, so we had to decide what we wanted to go after them. Since they were all really good egg laying breeds, we decided to try three different kinds: a Buff Orpington, White Leghorn, and Rhode Island Red. That way we might be able to learn about differences in traits, personalities, and habits of each to take into consideration when we get more in the future, though I hope that won't be for quite awhile. As long as they stay healthy and aren't lost to predators, they should all be great layers for us for the next three years or so.
Nick and the Rhode Island Red, which our niece named "Ashlyn"

Our coop is such a great set up. I'll have to do a post soon to show some of the details and the improvements we've made. The run fencing is thickly lined with weeds on all but the west side, which they quickly got to work on scratching and eating. In addition to those greens, they also get a lot of insects flying and crawling through the weeds and the dirt, and we're giving them select food scraps as treats. All that plus the layer feed gives them a diverse and well-balanced diet. The feed ensures they get enough calcium for egg shell production. We've only had them for a few days but are loving being chicken caretakers, and the cats are enjoying their company as well:


Update: June 30th we got our first egg!


It's now July 10th and we've gotten 6 eggs from the Buff Orpington, who is still the only one old enough to lay. The other two probably have a month or two to go, but soon we'll be getting a dozen a week or more. The shells are very thick, the yolks sit tall and firm, and they are incredibly DELICIOUS!

Thursday, June 12, 2014

Rain Collection Barrel for the Chicken Coop

Our property came with a barrel to collect rain water from the large covered backyard patio/roof, which we left as-is. I think it holds 55 gallons, since that seems to be the standard barrel size. It's elevated on concrete blocks and surrounded by fence planking, making it a bit more aesthetically pleasing since it's right next to our patio hangout space:


Eventually we might do something to brighten up the planks around it or something, but it's just fine for the time being. Notice the flowering bamboo/reed-like wall of plants along the patio edge in the above photo. I'll refer back to it later.

We were interested in collecting more water, so recently I picked up a free rain barrel through Craigslist for collecting rain run-off from the covered chicken run:

The free barrel and newly cleared area to the right where it will go
The barrel itself was in fine shape, being a very heavy-duty plastic. The people were giving it away because of a broken nozzle at the end of the very short hose attachment. Regardless of the hose nozzle, I found the existing set up was not very functional because the small plastic spout wouldn't allow for more than a trickle of water no matter what. So we upgraded. Nick used a 3/4 inch hollowing bit thing to drill around the existing drain hole and we installed a regular-sized spigot with an easy half-turn knob:

Concrete blocks found around the yard now have a purpose!
For us to do this meant turning the barrel on its side and me crawling into it to hold the interior piece in place with a wrench while Nick attached and screwed on the outer piece, which must have been a funny sight as I was almost 6 months pregnant at the time, almost 7 now. This is the first mention of it on the blog, so here's a recent photo of me working in the yard, which I'm still doing for several hours a day, almost every day:

Pregnant gardening!
Oh, and check out the patio rain barrel behind my left arm and the area along the edge where those previously-mentioned yellow-flowering bamboo/reed plants used to be. After much consideration and debate about whether or not to keep them, they are now gone. That was about a 30 hour project for me, primarily because the root system was incredibly deep and dense. I added some soil, tilled along the patio edge, and am growing two rows of peas along there on a little trellis. The patio living room area feels so much more open now with a great panoramic view of the yard instead of a wall of plants, which also extended several feet out into the usable yard space. Will make a post on that sometime.

Back to the coop rain barrel. The coop roof had an existing gutter, but it was in bad shape and was set up to empty out at an area where it would be inconvenient to have a rain barrel. We'd rather it be more hidden and out of the way instead of taking up precious yard space.

Before any of our coop improvements 
After removing the old gutter, I painted the wood frame it attached to in order to weather-proof it a little and so it matched the coop, which I'd recently painted with a second coat.


I cleaned out the old gutter to reuse some of it, and picked up a new 10-foot section plus some gutter accessories for my plan. The covered area is about 12 feet long through, so there's a section without gutter. I might add to that end eventually or just leave it as is.

Nick and I attached the new gutter in such a way to fight gravity and send the rain streaming to the north end of the coop and around the corner. Since the coop/run/land is all slightly south-sloping, the gutter needed to be angled sharply in the opposite direction to get the water to run that way, but we got it to work:

Water runs through the shiny and new gutter angled along the east side of the chicken run roof
And around the corner to the back side where I re-used a section of the old, sun-faded gutter
I still need to detach the gutter on this back end and paint the plywood and the run frame like I did to the other sections. Also in the photo above you can see that just underneath the lip of the corrugated roofing we installed a metal extension. Along several sections of the roof water would drip down between the gutter and the wood frame, so we attached this curved metal to ensure any runoff gets directed into the gutter.

And into the  barrel, where I can fill my watering can
With a 10 x 8 foot collection area, we will get almost 45 gallons, or almost a full barrel, for each inch of rainfall. We'd probably get 5 times that from the patio roof. During the periods of heavy rain, we could really use a series of barrels to collect overflow since we would really like to be able to keep enough to be able to exclusively water with rainwater during the summer, but that's a project for down the line.

Sunday, May 18, 2014

Patio Planter & Raspberry Shortcake

On our drive back to Portland from the olive grove tour last fall we stopped at this locally-owned nursery/garden center near Sherwood, Oregon because it was advertising a Japanese maple sale, and we wanted one of those for the garden area outside of the living room window. While there we looked at what else they had and there were several small potted raspberry plants that were fruiting. They were call 'raspberry shortcake' and they were delicious! We didn't buy then since it was the end of the season, but made a mental note to come back and get some for the spring.

Our house came with a bed of established golden raspberries, which I'd never had before because they are too fragile for transport so they may occasionally be found at a local farmers market, but that's it. Raspberries are y favorite berry, so I wanted to have several varieties. Raspberry shortcake is a dwarf variety, which meant they would do well in a planter and make a great green addition to our patio living room plan.

This project started with the purchase of a storage bench in the Ikea Applaro outdoor furniture line, which is what we picked for the patio. I put the bench together, leaving off the top lid piece to get what you see below:

Ikea Applaro storage bench
Then I used a staple gun and some very thick tarp (from a torn Burning Man shade structure) to create a sturdy liner:
 

Before filling it with soil, I made a few drainage holes in the bottom of the tarp. Then added the dirt and the two raspberry plants we picked up at the end of February when we passed the same nursery again on the way back from a beach trip:

Planted March 15th, 2014
It looked really sad. But just two months later last year's canes are full of leaves and ripening berries and new growth has filled in all around, which will provide a second round harvest later in the summer:

May 16, 2014
So perfect for a planter. These little guys would have been completely overrun by the giant raspberries in the garden box. We did have some extra space in there so I ended up planting an additional 3 varieties: Newburgh, Amity, and some starts of an unknown variety from a friend's garden. And it really does work perfectly as a planter on the patio, where I plan to spend many summer evenings relaxing on the outdoor couch with a bowl full of just-picked raspberries:

Pierre also enjoys relaxing on the patio
Update: June 12, 2014

We've been getting berries for about a week! Just 3 months between emergence from dormancy to this:


Sunday, March 30, 2014

Making Room for Strawberries

We've been making a lot of changes in the yard and one that is ready for documentation is the removal of bamboo from this garden bed and making it a more useful space for us. I assume that whoever planted the bamboo in the middle of this garden bed was doing so for kind of a privacy screen, because there is a small window on the second floor of the house next door.

Bamboo garden box when we moved in
We decided we'd rather use this garden bed for strawberries, but didn't get rid of the bamboo entirely: I transplanted 6 large pots full, located in between the bed and the fence. I really like bamboo, but I needed it to look as if it were placed more purposefully, and this arrangement still allows for a bit of taller natural privacy at this location along the fence.

I used about half of the existing bamboo, which was all I was able to easily dig up. The larger, more dense clump in the center had deeper roots and was too difficult to separate out. So I listed the remaining bamboo on the Portland Craigslist free section, and a guy was at our house within a few hours to dig out the rest of it and take it with him, leaving a really nice and empty garden box:


Since we planned to use this garden bed for strawberries, it made sense to remove the upper bed section and use just the lower. The upper section had started rotting at the edges, so the short ends pulled off easily on each side. As you can see, the top bed wasn't completely full, but before anything else I had to remove a lot of dirt and level the remaining soil to just below the lower bed line. Then I took a hammer and removed the small pieces of wood holding the longer side on, and removed that. I left the fence side plank on for now, but may remove it later. It's not really in the way there and that cuts down on wood waste if we can't find another use for these. In the photo below you can see the old boards leaning up against the shed on the left, which we are planning on getting rid of by also listing it on Portland's Craigslist free section.

We used some of the extra dirt to fill the raspberry bed and topped off two of the planned vegetable garden beds (the only 2 currently weeded and now ready for planting). I shoveled the remaining soil onto a tarp and into some pots, which we'll need once the rest of the garden beds are cleared of yard debris and weeded.

Strawberries planted
Amongst other things, I finished the extra dirt removal, took off the upper bed planks, and planted the strawberries on a single, 65+ degree Sunday in late March. The strawberries I'd purchased at Portland Nursery the Friday before on my way home from work. There are about three rows each of the three varieties I selected: Albion, Benton, and Quinault. I spent some time at the nursery reading all of the tags and decided on those three for best length of fruiting through the spring, summer and fall. We probably won't have much fruit on them this year  since they are just establishing and we're supposed to pinch off the flowers to help the plant grow larger and spread. Next year though, we'll have a very nice crop!

Update: September 2014. Pretty much all of the transplanted bamboo died, so I cut it all down! Still have to throw the roots in the compost bin and find a new place for the remaining soil. That will be a project for spring!

Saturday, February 22, 2014

The Pink Pearl

Nick and I went with some friends on a local winery tour last fall, and at one of the tastings there was a selection paired with apple slices that were such a bright pink that I thought maybe they'd been soaked in wine. I asked about the variety and was told it was a "Pink Pearl."

The inside of a Pink Pearl apple
After doing some research and finding they aren't very common to find for purchase, obviously the answer to this problem was to grow our own tree. There weren't a lot of places online that carry the variety and those that do appear to sell out quickly, so I put in an order right away.

The place I purchased my tree, Bay Laurel Nursery, doesn't ship right when you order. They allow you to select delivery date ranges in the early spring based on when the best time to plant is in your specific zone, so the tree arrives near the end of its dormant period and ready for transplant.

There was a slight delay in getting my tree as UPS fucked up and delivered to a completely wrong address several miles away, where some jerk signed for it even with the wrong address and name. On their third attempt to retrieve the package, UPS finally succeeded and got it to me--5 days late. I was worried a bit about it being in the box for so long, but since it was dormant, it was fine.

The area I chose for this tree is this little cove in the most south/eastern corner of the back yard:

Before
When we bought the house, the above is what this area looked like. Right off the photo on the left side is the east fence gate, and to the right is the house. This space wasn't being utilized well. A couple random tree seedlings were coming up, there was a large bush of dead grasses of some kind, and a cute but overgrown non-deciduous bush that I haven't identified. The latter was close enough to the house to be out of the way and nice enough to keep, but the tree seedlings and dead grass bush had to go.

At some point over the winter I took the hand saw to the seedlings. I also removed the random chicken wire and other junk. When the Pink Pearl arrived I prepped the rest: dug up the dead brush and pulled up all the long grass and ground covers. Nick helped dig up the roots from the previously-removed seedlings. After everything was cleared out I used the rototiller and turned all of the soil.

After
After moving the tree around to decide where best to place it, I dug a large hole and filled in around the roots. It's several feet from the fence on both sides so it should have plenty of room to grow up and out. With the sun high in the sky over the summer, it should have plenty of light where it is.  

Tree planted
There were a few fuzzy buds on this little guy when I planted it. I'll add some more photos when it has some leaves and blossoms on it this spring. It's only about 2 1/2 feet tall now, so I'm looking forward to seeing how much it grows. And maybe we'll have a couple of apples in the fall!

Thursday, January 16, 2014

Chicken Coop Improvements

In early January we had two consecutive weekends of partly-sunny skies and mid-40s temperatures, which gave us a jump start on some outdoor projects. The chicken coop needs some improvements before we can bring home a couple hens in the spring, so we started there.

The chicken run/yard area around the coop was really overgrown with weeds and blackberries, so first we cleared all of that out. Now we can finally walk around inside the entire enclosure!

Here's a before shot from early spring last year, before the yard became overgrown:


Fire thing Nick did was unhinge and flip that wall with the door as shown below so now the little chicken entrance is on the right side of the coop, which solved the problem of the chicken ladder being in the way of the human entrance. Nick also fastened extra gate latches to make the human entrance door more secure from predators. He also attached hook and eye latches in such a way that we can now keep the hinged front wall shown below open and safely attached to the 2 x 4 supports above when we need to clean out the inside of the coop.


Painting was the next big piece. The coop was white, but we wanted something more colorful. We selected this reddish-orange, which kind of makes the coop resemble one of those big red barns. 

Kind of matches Nick's vest too
First coat complete
On another nice weekend we'll put on a second coat of paint, clean out the inside of the coop, increase the size of the access door to the nesting box. After that we'll be adding a removable tray to the nesting box to make it easier to clean and finally line the coop with shavings. Then just add chickens. They don't really lay eggs unless it's warmer so now is the perfect time to get this all prepared for spring.

Pierre checking out the coop