Sunday, May 18, 2014

Patio Planter & Raspberry Shortcake

On our drive back to Portland from the olive grove tour last fall we stopped at this locally-owned nursery/garden center near Sherwood, Oregon because it was advertising a Japanese maple sale, and we wanted one of those for the garden area outside of the living room window. While there we looked at what else they had and there were several small potted raspberry plants that were fruiting. They were call 'raspberry shortcake' and they were delicious! We didn't buy then since it was the end of the season, but made a mental note to come back and get some for the spring.

Our house came with a bed of established golden raspberries, which I'd never had before because they are too fragile for transport so they may occasionally be found at a local farmers market, but that's it. Raspberries are y favorite berry, so I wanted to have several varieties. Raspberry shortcake is a dwarf variety, which meant they would do well in a planter and make a great green addition to our patio living room plan.

This project started with the purchase of a storage bench in the Ikea Applaro outdoor furniture line, which is what we picked for the patio. I put the bench together, leaving off the top lid piece to get what you see below:

Ikea Applaro storage bench
Then I used a staple gun and some very thick tarp (from a torn Burning Man shade structure) to create a sturdy liner:
 

Before filling it with soil, I made a few drainage holes in the bottom of the tarp. Then added the dirt and the two raspberry plants we picked up at the end of February when we passed the same nursery again on the way back from a beach trip:

Planted March 15th, 2014
It looked really sad. But just two months later last year's canes are full of leaves and ripening berries and new growth has filled in all around, which will provide a second round harvest later in the summer:

May 16, 2014
So perfect for a planter. These little guys would have been completely overrun by the giant raspberries in the garden box. We did have some extra space in there so I ended up planting an additional 3 varieties: Newburgh, Amity, and some starts of an unknown variety from a friend's garden. And it really does work perfectly as a planter on the patio, where I plan to spend many summer evenings relaxing on the outdoor couch with a bowl full of just-picked raspberries:

Pierre also enjoys relaxing on the patio
Update: June 12, 2014

We've been getting berries for about a week! Just 3 months between emergence from dormancy to this:


Plycraft Lounger Touchups

I occasionally see this same chair listed on craigslist or ebay for $500-1000, so we got a such a great deal for paying just $300. There were a few scuffs on the wood here and there, but nothing too bad. Here are a couple shots of the blemishes on there when we bought it:


With the exception of one small edge area where the wood was slightly damaged, the rest of the scuffs just needed to be buffed or sanded out. This was a quick project. I systematically worked my way over each section of the chair, using a fine sand paper to lightly remove or minimize the surface blemishes, then went over the entire thing with a nice wood oil. This was one of my rainy day projects at some point over the winter, just hadn't gotten around to posting about it.

Here are some shots of the chair post-clean up and oil polish:


So beautiful. It looks nearly new now. What surprises me is what great condition the leg bases are in. Compared to the wood parts, there's not as much you can do about improving those once damaged. Common problems I see on so many of the same loungers for sale out there are the metal is rusting significantly, the black base cap and/or an end piece or two is missing, but ours isn't missing anything and there's minimal tarnish on the legs.

Sunday, March 30, 2014

Making Room for Strawberries

We've been making a lot of changes in the yard and one that is ready for documentation is the removal of bamboo from this garden bed and making it a more useful space for us. I assume that whoever planted the bamboo in the middle of this garden bed was doing so for kind of a privacy screen, because there is a small window on the second floor of the house next door.

Bamboo garden box when we moved in
We decided we'd rather use this garden bed for strawberries, but didn't get rid of the bamboo entirely: I transplanted 6 large pots full, located in between the bed and the fence. I really like bamboo, but I needed it to look as if it were placed more purposefully, and this arrangement still allows for a bit of taller natural privacy at this location along the fence.

I used about half of the existing bamboo, which was all I was able to easily dig up. The larger, more dense clump in the center had deeper roots and was too difficult to separate out. So I listed the remaining bamboo on the Portland Craigslist free section, and a guy was at our house within a few hours to dig out the rest of it and take it with him, leaving a really nice and empty garden box:


Since we planned to use this garden bed for strawberries, it made sense to remove the upper bed section and use just the lower. The upper section had started rotting at the edges, so the short ends pulled off easily on each side. As you can see, the top bed wasn't completely full, but before anything else I had to remove a lot of dirt and level the remaining soil to just below the lower bed line. Then I took a hammer and removed the small pieces of wood holding the longer side on, and removed that. I left the fence side plank on for now, but may remove it later. It's not really in the way there and that cuts down on wood waste if we can't find another use for these. In the photo below you can see the old boards leaning up against the shed on the left, which we are planning on getting rid of by also listing it on Portland's Craigslist free section.

We used some of the extra dirt to fill the raspberry bed and topped off two of the planned vegetable garden beds (the only 2 currently weeded and now ready for planting). I shoveled the remaining soil onto a tarp and into some pots, which we'll need once the rest of the garden beds are cleared of yard debris and weeded.

Strawberries planted
Amongst other things, I finished the extra dirt removal, took off the upper bed planks, and planted the strawberries on a single, 65+ degree Sunday in late March. The strawberries I'd purchased at Portland Nursery the Friday before on my way home from work. There are about three rows each of the three varieties I selected: Albion, Benton, and Quinault. I spent some time at the nursery reading all of the tags and decided on those three for best length of fruiting through the spring, summer and fall. We probably won't have much fruit on them this year  since they are just establishing and we're supposed to pinch off the flowers to help the plant grow larger and spread. Next year though, we'll have a very nice crop!

Update: September 2014. Pretty much all of the transplanted bamboo died, so I cut it all down! Still have to throw the roots in the compost bin and find a new place for the remaining soil. That will be a project for spring!

Friday, March 28, 2014

New Water Heater & (Surprise) Furnace

It was only a matter of time before we needed to hire an outside company to come in on one of our planned projects. This is the first! The pipes in the house were galvanized steel and needed to be updated. There was of course absolutely no way we were going to try replacing the water pipes within our walls and crawl space by ourselves.

We received a referral for re-piping specialists by the company providing an estimate for a new water heater. Originally we were thinking about getting a tankless water heater instead of the traditional tank, but eventually decided against it. We have never run out of hot water with a regular tank, so needing endless hot water wasn't really an issue. We are going with one fueled by gas instead of electricity, which will be more efficient, and it's placement is right next to the furnace, so it's no longer taking up valuable space. Another benefit to a regular tank is extra water storage in the event of an emergency.

Here is the the original electric water heater and it's location in relation to the furnace (And ugly screen door that no longer exists:


Goodbye old water heater
And hello new water heater:


It fit perfectly between the furnace and the brick exterior of the fireplace, where there was even an existing exhaust port through which to run the additional duct work.

We thought all went well as they finished and cleaned up that Friday afternoon...until later that evening when temperatures dropped and the furnace kicked on for the first time. I heard what sounded like a door slamming in the garage. After turning on the light, then a fuse blowing, leaving me in darkness, I saw an orange glow and flames coming from the lower section of the furnace. It was on fire.

The small amount of gas that ignited burned out quickly, with Nick blowing out the remaining flame. He pulled into the driveway right when this was happening, and I had opened the garage door to air out the smoke smell that immediately filled the air.

Thinking this was probably related to the plumbing company tapping into the gas line shared by the furnace, we called them and the owner came to check it out and take some pictures on Saturday morning. Then his furnace guy came by a few days later and concluded that yes, it probably was something they did on installation of the water heater - likely not reattaching something properly. So the next day he was back with a brand new furnace for us. The original furnace was older and would have cost as much to repair as install a new one. Luckily this was all covered by the plumbing company. So instead of just a new water heater, we ended up with a new furnace as well. With all of the other necessary purchases on the house this year, we figured we'd use the old one for the winter and replace it in the fall. Now we don't have to! With this upgrade, every single appliance in our house - from furnace and water heater to toaster oven - is brand new in the past 6 months.

And I can't believe I forgot to take a picture of the old furnace post-fire, but it really wasn't that bad, Just a little charring on the metal and burned plastic coating on some wires. But here's the new pair:


And now the corner where the water heater used to be is much more open. Eventually we'll be finishing the garage and this will be a nice area of built in (upper and lower) cabinets with space for the mini-fridge, new sink and counter tops.


Friday, March 7, 2014

Cabinet 'Demolition' & Dishwasher Installation

We've been so busy with other things that progress on the kitchen has been on hold. Everything that is left to do is dependent on other things being done, and we're finally on our way to completing them now that the water pipes have been replaced. In addition to replacing the pipes, the workers also installed our new dishwasher. So in preparation for that, we had to do a little "demolition" to make room, since it wasn't just that the house didn't come with a dishwasher, it has never HAD a dishwasher.

Like we did with the refrigerator, we chose a smaller one to better fit the kitchen. That way our needs are met with minimal disruption to the flow and it doesn't feel like we tried cramming too much into the space. After not having a dishwasher for years (4+ for me, 12+ for Nick), just having one at all will feel like a luxury! We'll probably just run a load or two per week and continue hand washing pots and pans, since we use those almost daily.

After much research and reading consumer reviews, we decided on this Frigidaire 18" dishwasher in black. We decided against a stainless steel exterior in order to allow the dishwasher to blend in more with the lower cabinets rather than stand out.

 
We actually ordered this back in January and it's been in the garage since then. Once we set a date for the water pipe replacement and dishwasher installation, it was time to do "demolition," with demolition in quotation marks because there was really very little that needed to be done. Nick took on this project:

Removing the cabinet end, which was just this half-wall thing 

After end piece removal
We couldn't extend the existing base to create the wider dishwasher platform because it was too tall. We needed something at a height about half that. So we removed it to get down to the flooring:


The newly opened area under the counter top. You can see where we moved the range plug, which would have been in the way directly behind the dishwasher.


And a shot of the dishwasher temporarily in place:


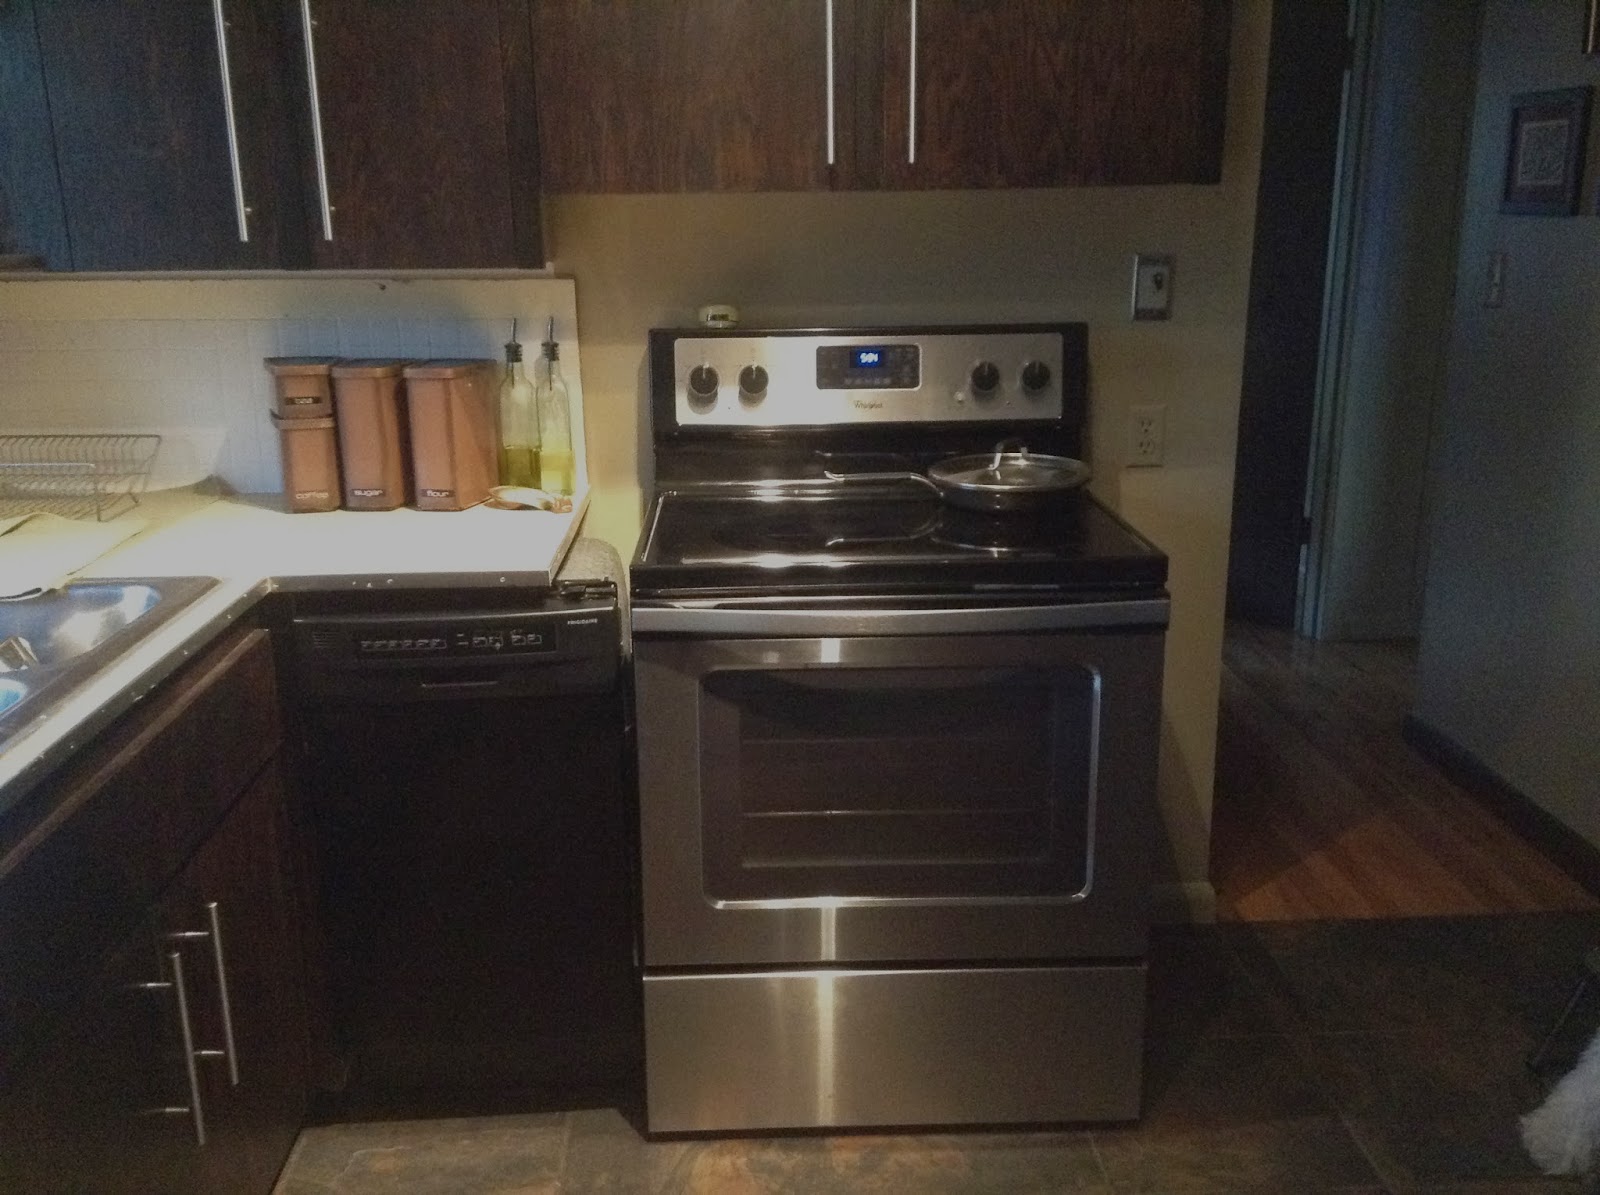
We still need to build a little platform for it to sit on, to bring the top of the dishwasher up to where it needs to be in order to attach to the underside of the future new counter top. Here's an 'after' shot of dishwasher and range together, pre-platform for dishwasher:


The new counter top will extend across that gap shown above and nearly be a nearly seamless transition to the range. We are well on our way to finishing the kitchen now. We waited on the dishwasher installation until we had the new pipes. We could not get accurate measurements for a new counter top until the dishwasher was in, so now we can get that measured and ordered. Then we can start removing the old back splash, and once the new counter top is installed (another job we're not doing ourselves), we can put in the new back splash. 

Saturday, February 22, 2014

The Pink Pearl

Nick and I went with some friends on a local winery tour last fall, and at one of the tastings there was a selection paired with apple slices that were such a bright pink that I thought maybe they'd been soaked in wine. I asked about the variety and was told it was a "Pink Pearl."

The inside of a Pink Pearl apple
After doing some research and finding they aren't very common to find for purchase, obviously the answer to this problem was to grow our own tree. There weren't a lot of places online that carry the variety and those that do appear to sell out quickly, so I put in an order right away.

The place I purchased my tree, Bay Laurel Nursery, doesn't ship right when you order. They allow you to select delivery date ranges in the early spring based on when the best time to plant is in your specific zone, so the tree arrives near the end of its dormant period and ready for transplant.

There was a slight delay in getting my tree as UPS fucked up and delivered to a completely wrong address several miles away, where some jerk signed for it even with the wrong address and name. On their third attempt to retrieve the package, UPS finally succeeded and got it to me--5 days late. I was worried a bit about it being in the box for so long, but since it was dormant, it was fine.

The area I chose for this tree is this little cove in the most south/eastern corner of the back yard:

Before
When we bought the house, the above is what this area looked like. Right off the photo on the left side is the east fence gate, and to the right is the house. This space wasn't being utilized well. A couple random tree seedlings were coming up, there was a large bush of dead grasses of some kind, and a cute but overgrown non-deciduous bush that I haven't identified. The latter was close enough to the house to be out of the way and nice enough to keep, but the tree seedlings and dead grass bush had to go.

At some point over the winter I took the hand saw to the seedlings. I also removed the random chicken wire and other junk. When the Pink Pearl arrived I prepped the rest: dug up the dead brush and pulled up all the long grass and ground covers. Nick helped dig up the roots from the previously-removed seedlings. After everything was cleared out I used the rototiller and turned all of the soil.

After
After moving the tree around to decide where best to place it, I dug a large hole and filled in around the roots. It's several feet from the fence on both sides so it should have plenty of room to grow up and out. With the sun high in the sky over the summer, it should have plenty of light where it is.  

Tree planted
There were a few fuzzy buds on this little guy when I planted it. I'll add some more photos when it has some leaves and blossoms on it this spring. It's only about 2 1/2 feet tall now, so I'm looking forward to seeing how much it grows. And maybe we'll have a couple of apples in the fall!

Saturday, February 8, 2014

Gainey Pots and Indoor Plants

With south-facing floor-to-ceiling windows and such a big living room space, adding a few indoor plants was an obvious must. Especially after scoring two large Gainey pots on Craigslist. I wanted to have at least one fruiting tree, since our entire space is so much about functionality. The first was an easy choice - a lime tree!

After doing some research on different varieties and finding out which grow best indoors, I decided on a 3-year old Bearss lime tree, which we purchased back in early October from Four Winds Growers. It's a seedless variety, and when ripe we'll be able to pick limes right from the tree in the living room and add to a rum and coke, Nick's famous tacos, or just a glass of water.

It began blossoming in mid-January, and here's a picture of it on February 1st:


I selected the matte black planter for the lime tree, which is my favorite of the two Gainey pots. It looks a bit funny because the tree is only about 2 feet tall right now, but it will definitely grow into it. The Bearss lime is a semi-dwarf variety, which means it can get up to about ten feet tall. We'll probably let it grow to around the top of the window. And there's a plant caster with wheels underneath the pot to make it easier to move if needed.

I was really surprised at the number of blossoms on such a small tree. Obviously they won't ALL turn into limes, but there are easily over 50 of them on this little guy already. Here's a closer look at the top cluster:


I liked the idea of having the window framed by plants on each side, and really wanted another fruit of some kind that wouldn't do well outside here (at least not year-round). We considered avocado, pomegranate, and another variety of citrus, settling on a clementine tree. Finding true clementines in the store is sometimes difficult. I would like an avocado tree, but there are several cold-hardy varieties that grow just fine outside in the northwest, so that's what we will get if/when we decide to get one of those.

The grower where I found my lime tree doesn't sell clementines, so I just looked around for a good deal. Once ordered, the clementine tree took awhile to arrive because of a snowstorm in the midwest, and it was pretty much dead on arrival. The company does have a replacement policy and did send me a new one, though it seemed to take threatening to contact my credit card company to reverse the charge to hear back from them, claiming they hadn't gotten my earlier email. So I'm not going to name the company I bought from. Also they've sent me so many spam emails since my purchase, while I've had zero from Four Winds.

Still, once they sent my replacement clementine it arrived quickly AND was blossoming, which was great! It's a 5-6 year old plant and quite tall:

We also have a little aloe plant at the base of the clementine
You can see in the above photo the second Gainey pot, similar to the other but a glossy black instead of matte. I don't like the shiny finish as much as matte, so from most views within the room it's partially hidden behind the Plycraft chair.

The trunk and branches are pretty thin but will thicken up over time. There was a pretty good-sized unripe clementine on one of the branches upon arrival and it made that branch droop over a lot, so I'm not sure how it will handle mass fruiting. This one has quickly gone from having a few blossoms to, like the lime tree, having at least 50 in clusters all over.

Closer look at one side of clementine blossoms
I've been pollinating both of the trees with a small paintbrush since there aren't any bees around to do it. We'll see over the next few months how well that worked.

The final indoor planter we needed to find an inhabitant for was the pot and stand we bought from Modernica. With the two larger indoor pots being used for fruit trees, this smaller one was perfect for a purely decorative plant. We perused the indoor/tropical section of Portland Nursery and fell in love with this dracaena marginata, or Dragon Tree. It's the 'colorama' variety, so instead of solid green fronds it has green and pinkish-red ones. Since this matte black pot matches well with the matte black Gainey planter, those are the most prominently featured within the living room. The dragon tree and its beautiful pot and stand looks perfect placed between the fireplace and the hutch.


We also recently found 2 smaller brown Gainey pots at Hawthorne Vintage in Portland, but those will be used outside on the patio, plants to be determined.